> ## Documentation Index
> Fetch the complete documentation index at: https://help.polygon-one.com/llms.txt
> Use this file to discover all available pages before exploring further.
# Suppliers
> Create, import, and manage supplier data
## Overview
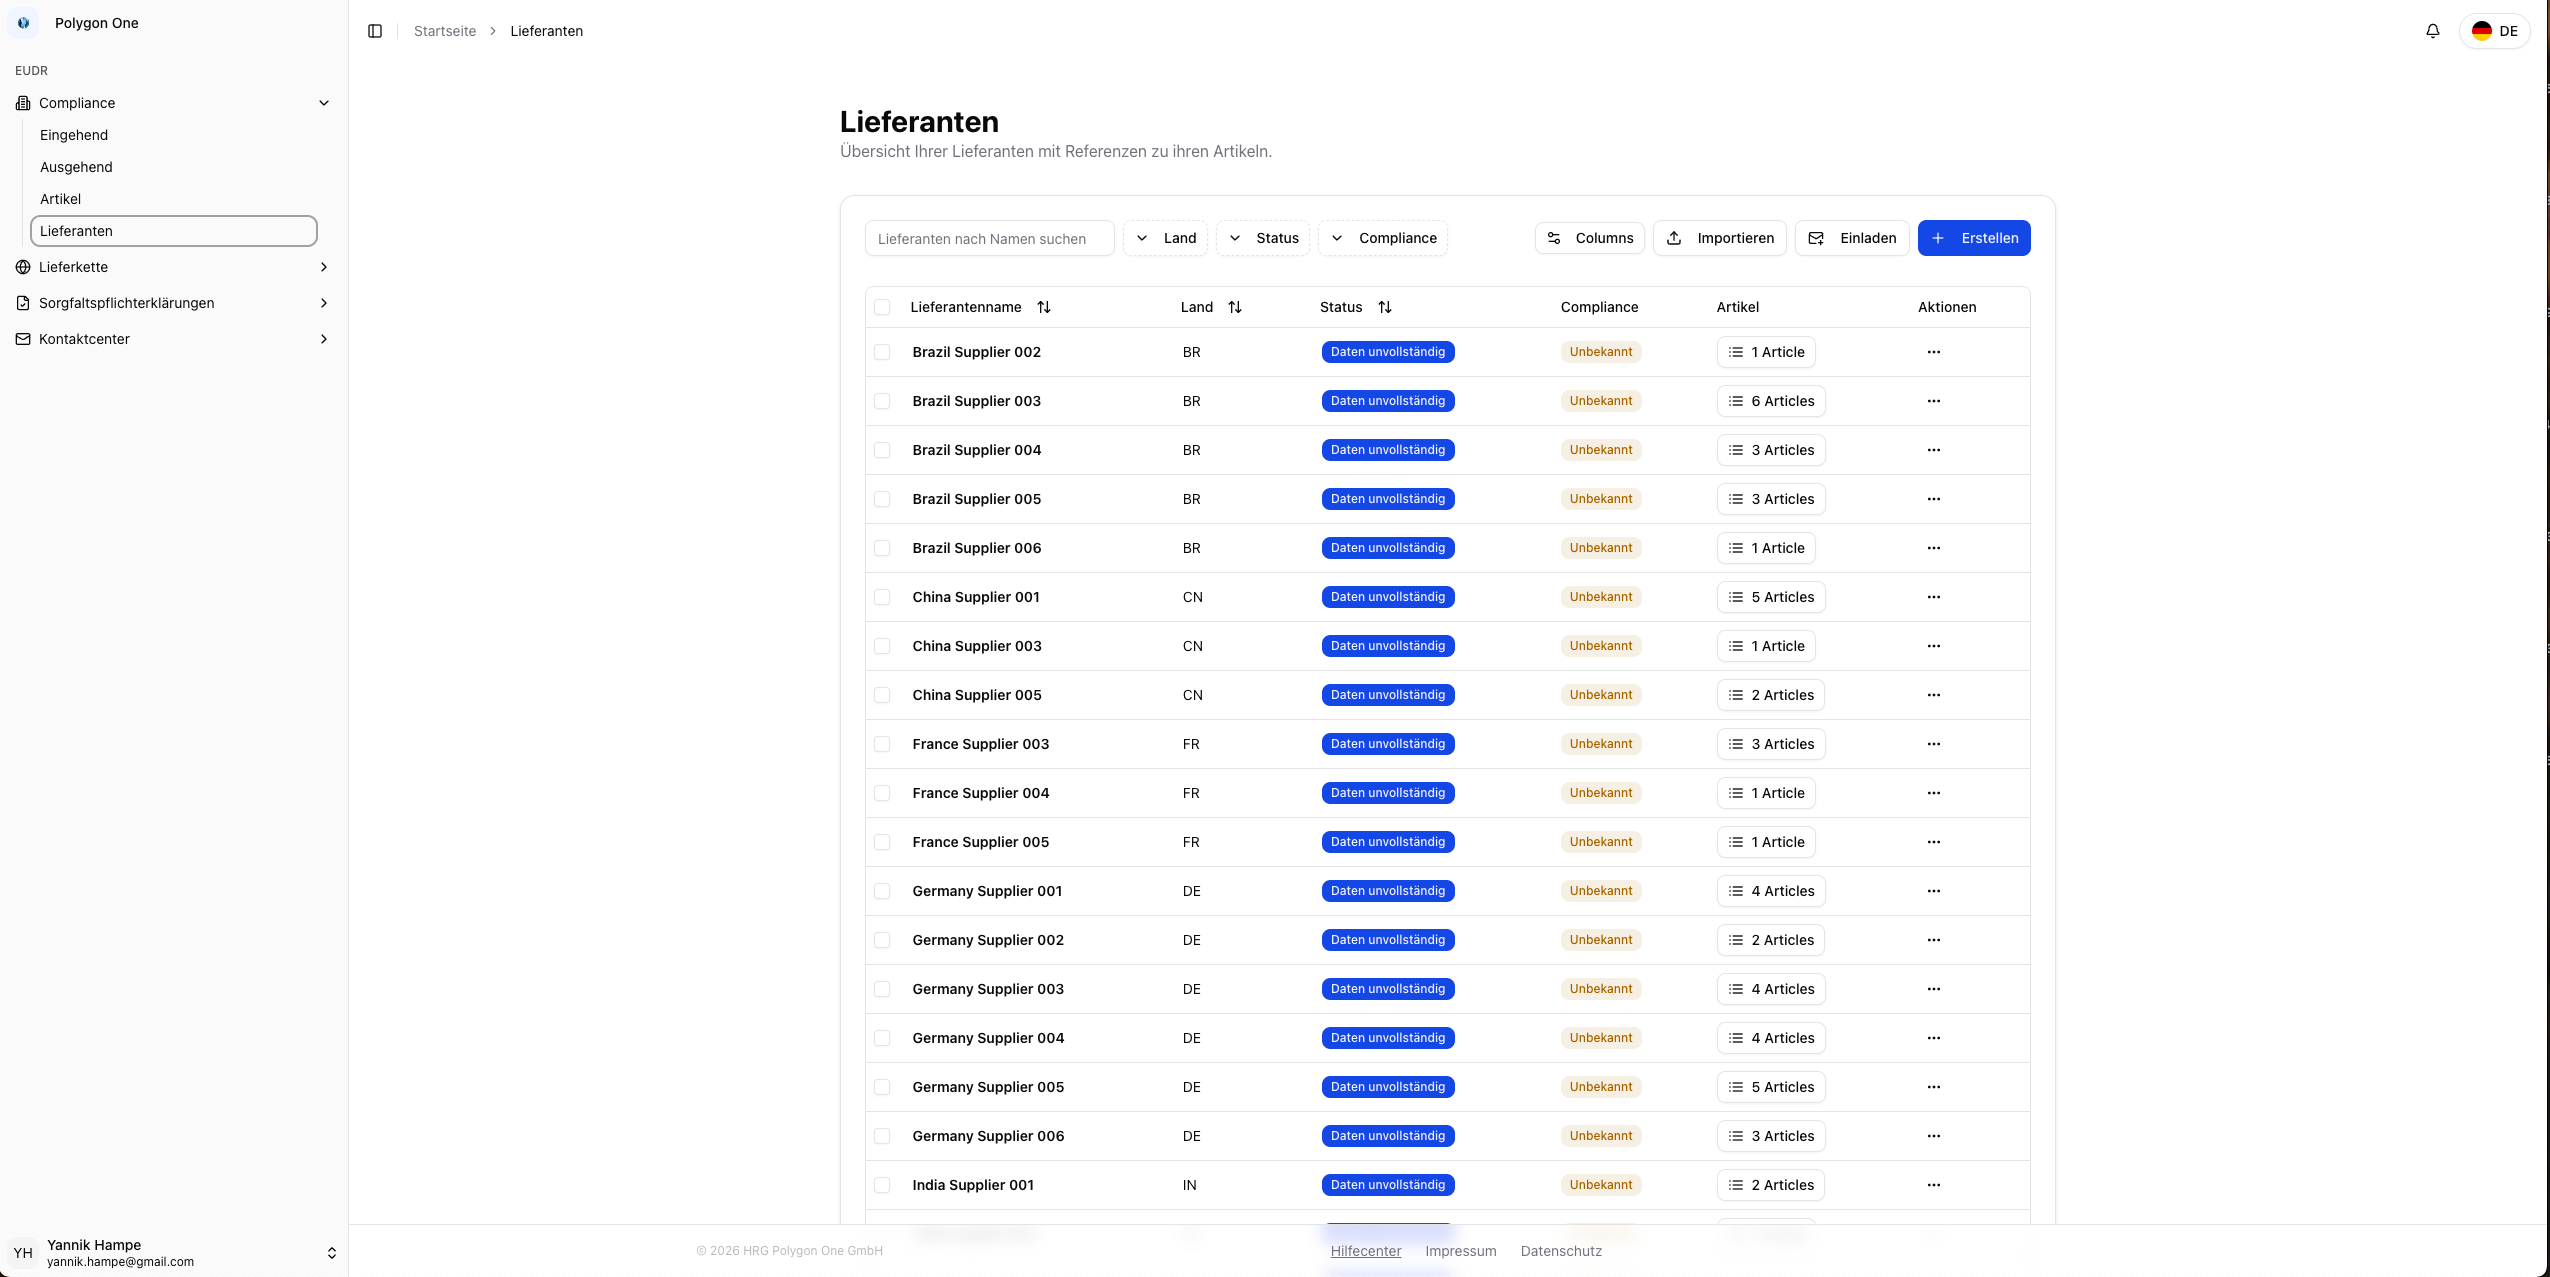
In the **Suppliers** area under the **Compliance** section, you manage all of your company's suppliers. Suppliers must be created before you can link articles to them or import orders.
 ## Importing Suppliers (CSV)
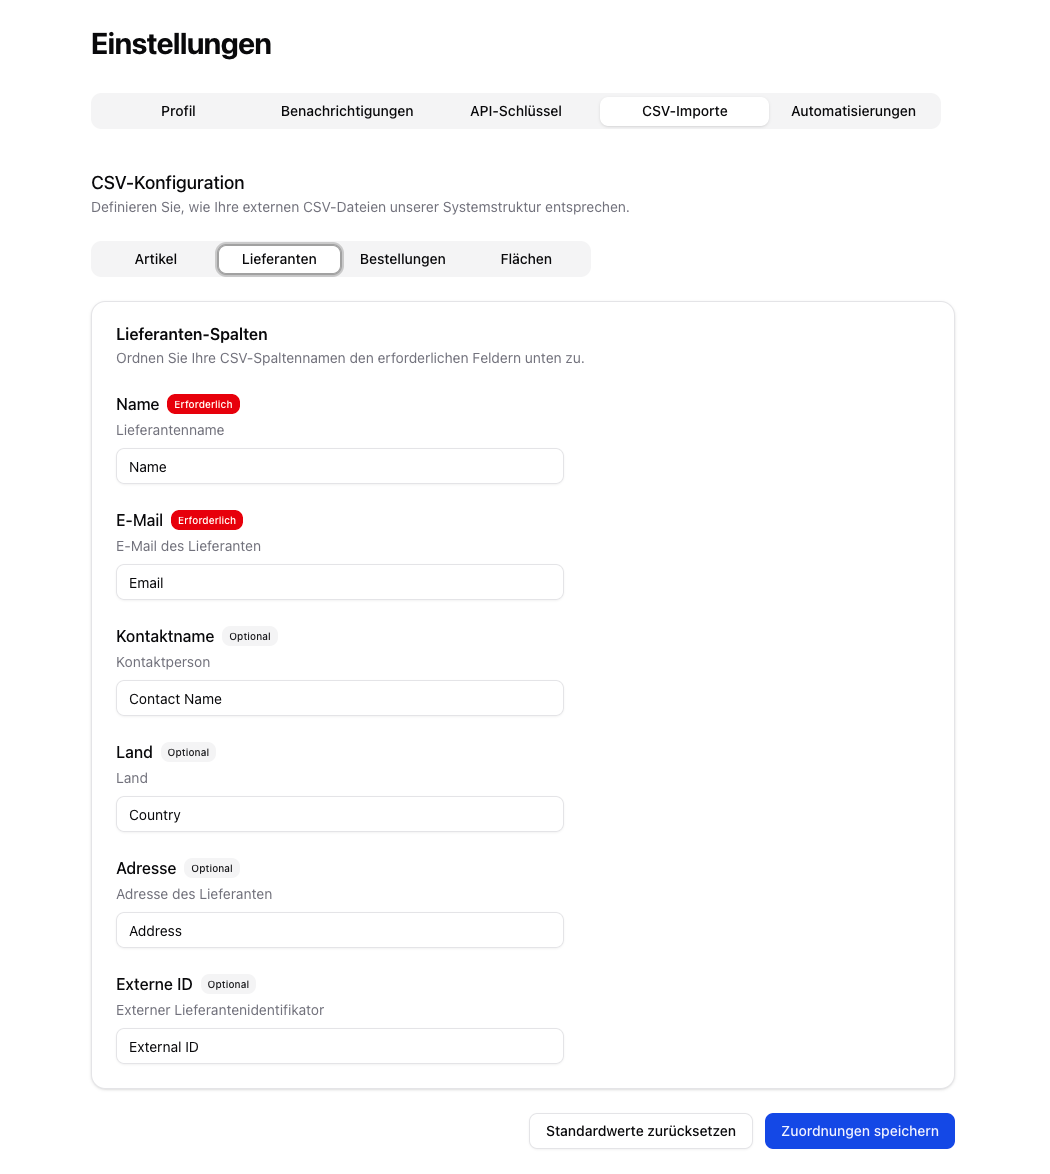
The fastest way to create many suppliers at once is the CSV import. The column mapping can be pre-configured under **Settings → CSV Imports**, allowing you to keep your own CSV structure.
### CSV Fields
| Field | Required | Description |
| ------------------ | -------- | ---------------------------------------------- |
| **Name** | Yes | Company name of the supplier |
| **Email** | Yes | Contact email of the supplier |
| **Contact Person** | No | Name of the contact person |
| **Country** | No | Country of origin |
| **Address** | No | Address of the supplier |
| **External ID** | No | External supplier identifier (e.g. ERP number) |
### Performing the Import
Create a CSV file containing at least the required fields (Name, Email).
Before you trigger the import, map the columns of your CSV file to the corresponding fields in Polygon One under **Settings → CSV Imports**.
## Importing Suppliers (CSV)
The fastest way to create many suppliers at once is the CSV import. The column mapping can be pre-configured under **Settings → CSV Imports**, allowing you to keep your own CSV structure.
### CSV Fields
| Field | Required | Description |
| ------------------ | -------- | ---------------------------------------------- |
| **Name** | Yes | Company name of the supplier |
| **Email** | Yes | Contact email of the supplier |
| **Contact Person** | No | Name of the contact person |
| **Country** | No | Country of origin |
| **Address** | No | Address of the supplier |
| **External ID** | No | External supplier identifier (e.g. ERP number) |
### Performing the Import
Create a CSV file containing at least the required fields (Name, Email).
Before you trigger the import, map the columns of your CSV file to the corresponding fields in Polygon One under **Settings → CSV Imports**.
 Navigate to the **Suppliers** area and click **Import**.
Select the file on your computer and click **Open**.
In the **preview**, review the detected rows and select the records to import. Then confirm the import.
Under **Settings → CSV Imports → Suppliers** you can permanently map your column names to the Polygon One fields. You can also adjust them for each file you import.
## Creating Suppliers Manually
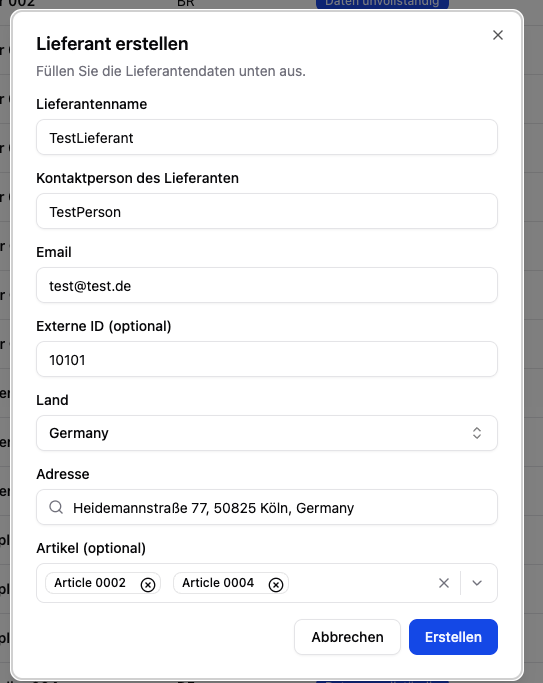
In the **Suppliers** area, click **Create**.
Fill in the following fields:
* **Supplier name** (required)
* **Email** (required)
* **Contact person** (optional)
* **Country** (required)
* **External ID** (optional) — e.g. your internal ERP supplier number
* **Articles** (optional) — assign articles directly
Navigate to the **Suppliers** area and click **Import**.
Select the file on your computer and click **Open**.
In the **preview**, review the detected rows and select the records to import. Then confirm the import.
Under **Settings → CSV Imports → Suppliers** you can permanently map your column names to the Polygon One fields. You can also adjust them for each file you import.
## Creating Suppliers Manually
In the **Suppliers** area, click **Create**.
Fill in the following fields:
* **Supplier name** (required)
* **Email** (required)
* **Contact person** (optional)
* **Country** (required)
* **External ID** (optional) — e.g. your internal ERP supplier number
* **Articles** (optional) — assign articles directly
 Click **Create** to add the supplier.
## Editing Suppliers
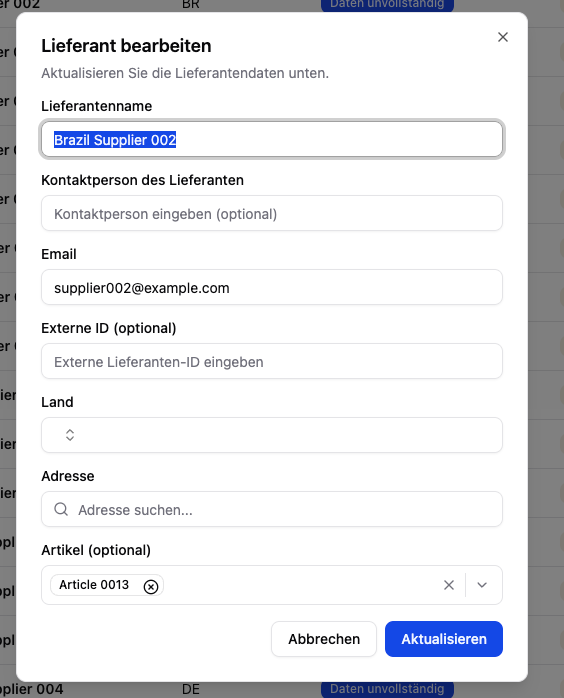
Existing suppliers can be edited at any time from the table:
1. In the supplier list, click the **Actions** menu (⋯) for the supplier you want.
2. Select **Edit**.
3. Adjust the fields and save.
Click **Create** to add the supplier.
## Editing Suppliers
Existing suppliers can be edited at any time from the table:
1. In the supplier list, click the **Actions** menu (⋯) for the supplier you want.
2. Select **Edit**.
3. Adjust the fields and save.
 ## Inviting Suppliers
You can invite suppliers to provide data directly from the supplier list:
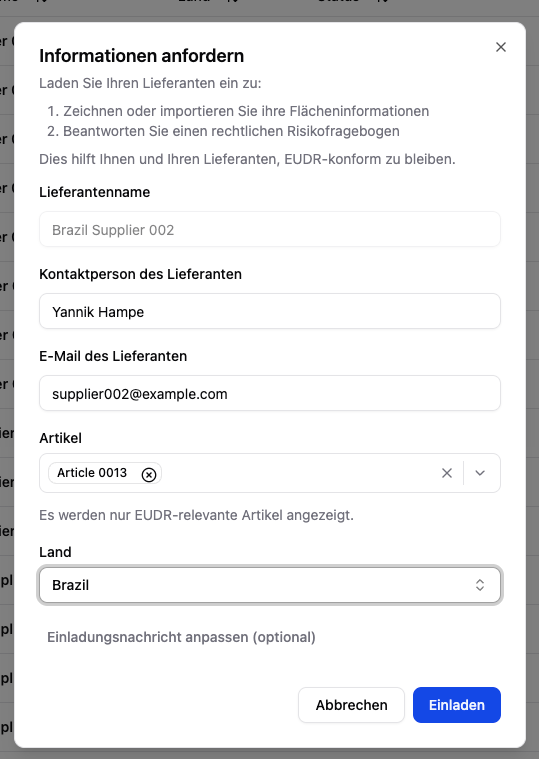
1. Click **Request information** for the supplier you want.
2. Select the EUDR-relevant articles for which data is needed.
3. Optional: Customize the invitation message.
4. The supplier receives an email with access to the supplier portal.
## Inviting Suppliers
You can invite suppliers to provide data directly from the supplier list:
1. Click **Request information** for the supplier you want.
2. Select the EUDR-relevant articles for which data is needed.
3. Optional: Customize the invitation message.
4. The supplier receives an email with access to the supplier portal.
 Using the **Invite all suppliers** function in the inbound or data collection workflow, you can also send bulk invitations. All suppliers with an email address are invited at the same time.
Use the **REST API** for automatic synchronization with your ERP system. You can find the details in the [API reference](/en/api-reference/introduction).
Using the **Invite all suppliers** function in the inbound or data collection workflow, you can also send bulk invitations. All suppliers with an email address are invited at the same time.
Use the **REST API** for automatic synchronization with your ERP system. You can find the details in the [API reference](/en/api-reference/introduction).