

Overview
Instead of creating units and components one by one, you import them in bulk from CSV or Excel files. The import is built for scale and offers, for units and components, an overwrite preview as well as a result with created, updated and skipped rows. Accepted formats: CSV and Excel (.csv, .xlsx, .xls).
Where the import buttons are
The import buttons sit in the toolbar of the respective list. Each button is a split button: Import plus a menu to download the matching template.
There is no separate bill-of-materials import: the links between units and components are created directly in the unit import via the Component Codes column (see below).

The import buttons in the toolbar of the packaging units list
Preview and validation
1
Choose a file
Click Import and select your CSV/Excel file. Polygon One reads the file and validates each row against the schema.
2
Valid and invalid rows
Valid rows are staged for import; invalid rows (e.g. unknown enum values, invalid GTIN, missing required fields) are reported with their reason. If a column mapped as required is missing entirely, this is reported as a column error — not as a silent per-row failure.
3
Confirm overwrites
The units and the components import are an upsert (matched by internal reference or code; a unit row without a reference always creates a new unit). If the import would overwrite an existing value, the preview opens first, where you decide row by row. Pure fill-ins (populating empty fields) are applied automatically.
4
Result
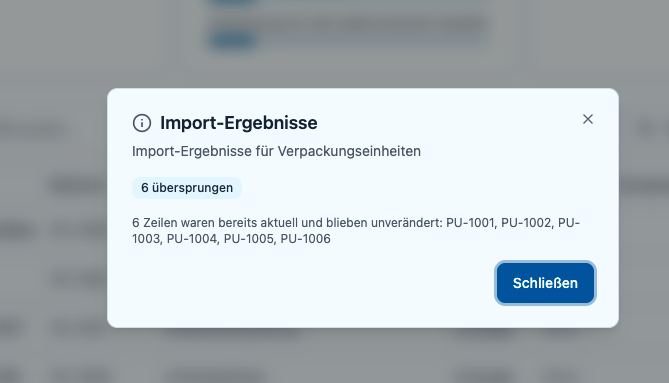
At the end, the result shows how many rows were created, updated, skipped, and which errors occurred.
The import preview with valid, to-confirm and skipped rows
Which columns exist
The template carries the column headers in your interface language: the German template has German headers (Materialien, Masse (g), …), the English one the English headers. Under Settings → CSV Imports you can save your own column mapping for units and components if your file uses different headers.The Excel template (
.xlsx) is the recommended download. It contains a second sheet, “Guide”, listing each column’s requirement, description and accepted values. The CSV template is the plain alternative without that sheet. In coded columns the code (e.g. plastic) always works — the import additionally accepts the label in your interface language (Plastic, Kunststoff on a German login), see Accepted values in coded columns below.Packaging units
Columns in template order: Name, Reference (internal reference, matching key, optional), Packaging Type, Role, Supplier, Format, Recyclability Grade, GTIN, Width (mm), Height (mm), Depth (mm), Market Member States, Description & Intended Use, Own Brand, Modifies Conformity, Article Numbers, Component Codes. Required columns: Name, Packaging Type, Role, Description & Intended Use. The last two are link columns: Article Numbers links the unit to existing articles by their internal article number, Component Codes builds the bill of materials (links the unit by component code, quantity 1; already-existing links are not duplicated on re-import).Leaving the reference blank
Reference is no longer a required column: you may leave it empty or omit it entirely. Polygon One then assigns the next free reference for your company automatically —PU-1, PU-2, PU-3 and so on. References you provide yourself are never changed or renamed.
This does not change the matching — the reference remains the unit import’s matching key:
Follow-on imports still address units by reference — the Component Codes link column, the article-link import, the bill of materials via the API (
specInternalRef) and the quantity report. If you imported units without references, take the assigned PU-n values from the Packaging units list (or its export) first and use them in the follow-up file.Components
Columns in template order: Code, Name, Supplier, Materials, Polymer, Mass (g), Recycled Content (%), Recycled Source, Recycled Method, Contact-sensitive, Food-contact, Heavy Metals (mg/kg), Heavy Metals Basis, Heavy Metals Method, PFAS Compliant, PFAS Basis, PFAS Method, PFAS Sum (ppb), Total Fluorine (mg/kg), Notes. Required columns: Code, Name, Materials.Resolution notes: Supplier is resolved server-side by name (no match → no supplier). For units, an empty Market Member States column imports as an empty list — the import sheet is authoritative and is not backfilled from the PPWR default setting. Unknown Article Numbers are skipped; an unknown Component Code automatically creates a minimal placeholder component (code = name) that you then complete in the components list.
Articles
Import articles via Import on the Articles list of the PPWR module. The shared article template applies — the full column list is documented under Articles (EUDR data management).The HS code is not mandatory in the PPWR module. Only users with the EUDR module must provide it when creating new articles; PPWR-only users simply leave the column empty. Name and Internal Article Number remain required — and purchase articles need a Supplier (name or external supplier ID).
Accepted values in coded columns
In the columns below the import accepts two spellings per value: the code (plastic) and the label in parentheses (Plastic) — that is, exactly the text Polygon One displays in the language you use the app in. The code is the spelling the templates ship and works regardless of language; the label is the convenient option when your file already holds the displayed values. On a German login the German labels apply (Kunststoff → plastic).
Case and surrounding whitespace do not matter (PET = pet), but the label must read exactly as listed below — shortenings such as Paper instead of Paper / board, or typos such as Plstic, fail. An unknown value fails only the affected row (“Invalid value”, which lists the accepted values); the remaining rows still import.
Packaging units
Components
Labels with a parenthetical — for
non_recyclable, pcr and pir the part before the bracket is enough too (Non-recyclable, Post-consumer, Post-industrial).Yes/no columns — Own Brand, Modifies Conformity, Contact-sensitive, Food-contact, PFAS Compliant — accept yes/no as well as ja/nein, true/false, 1/0. Blank means no; for PFAS Compliant, blank means unknown.List columns — Materials, Market Member States, Article Numbers, Component Codes — separate multiple values with ; or , (e.g. plastic;paper_board or Plastic;Paper / board). Every value in the list is resolved individually, so mixed spellings are allowed. Market Member States takes two-letter country codes (DE;FR).Custom value mappings
Codes and labels work without any configuration. If your file uses spellings beyond those — an internal name such asPE film or an ERP abbreviation such as PL — you do not have to rewrite the file: under Settings → CSV Imports you can store a value mapping for each coded column. This is exactly what the “Invalid value” error in the import result points to.
1
Choose the data type
Open Settings → CSV Imports and select the Packaging units or Components tab. In the PPWR module, the Suppliers and Articles tabs are available there too.
2
Open the value mappings
Under the relevant column, click Custom value mappings. The section only appears for coded columns — exactly the ones in the table above.
3
Enter your own spelling
For each accepted value there is a “CSV value for …” field. Enter the spelling used in your file — e.g.
PE film in the field for Plastic (plastic).4
Save
Save Mappings. The mapping is stored per data type and applies to every subsequent import.
- Exactly one own spelling per accepted value (1:1). If your file contains several variants of the same value, unify them beforehand.
- Matching ignores case and surrounding whitespace.
- The code itself is always accepted, even when a mapping is stored. For one and the same spelling the order is: code first, then your mapping, then the shipped label — so your mapping overrides the label, never the code.
- In list columns such as Materials, every value in the list is mapped individually.
- Empty fields mean “no mapping”. Reset Defaults restores both the column and the value mappings to the shipped state; Save Mappings applies it.
Back to the data model
How articles, units and components relate.